 Jays Arcade Classics Gaming Machine
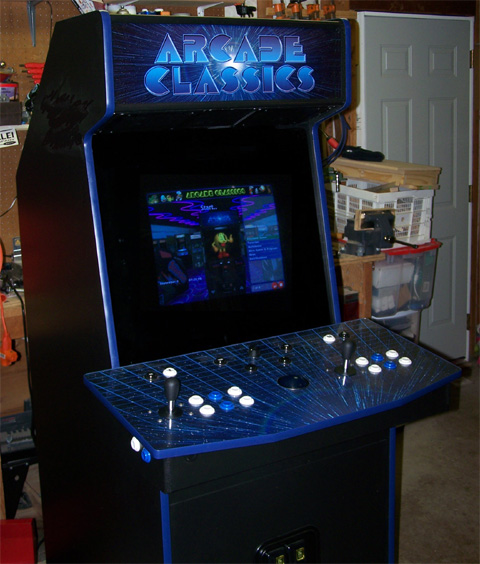
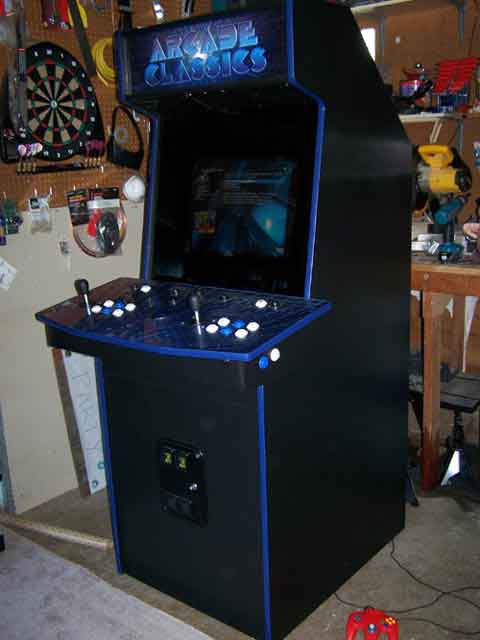
Arcade Classics became a reality this year (2006) due to much convincing of my wife that the family and I needed it. After several months of researching and playing around with different emulators and front-ends I finally started building Arcade Classics in January and it is now as you see it, complete, minus side graphics and light guns.
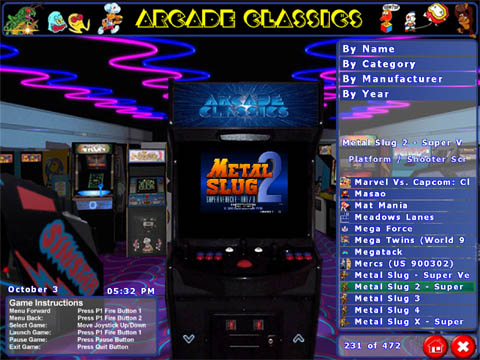
The Arcade Classics cabinet runs the very excellent front-end GameEx , which controls all emulators such as MAME, Dahne, P64, JNES, GENS, Model 2, Zinc, Pin-MAME, ZNES, dos-box pc games etc. etc. as well as being an entertainment center for music, DVDs on hard disk, karaoke, web radio, slideshow player and the list goes on and on. The support for GameEx is incredible with new releases and new features coming out almost every week. If you are looking for a front-end that is easy to implement and has a great support community, look no further that GameEx. The cabinet itself is mostly based on plans from Arcade Paradise (archive link) with a few modifications along the way, such as the addition of a keyboard/Playstation 2 drawer, smoked glass, and other minor things that you would modify on the control panel to get your own personal set-up. A lot of the control panel hardware was bought from Tornado Terry's such as 100% Happ buttons with cherry micro switches and a 3" blue translucent trackball. The joysticks are Ultimarc 4/8 ways that I won on E-bay for $25. The spinner is a hack from a hard drive that I read about on Arcade Stupidity which works great and was very easy and fun to make. The Graphics for the marquee and control panel were purchased from Classic Arcade Grafix. (Since the time of this writing, Classic Arcade Grafix no longer sells arcade art. See links section for more graphics links). I would have to say the best site to go to for cabinet building information is BYOAC (build your own arcade controls). They have tons of links to websites featuring cabinets that others have built. This would be the first place I would start in my quest for information about building a MAME cabinet. The hardest thing I have left to do on Arcade Classics is to convince my wife to let me bring it into the house.


Update
I convinced my wife how nice it looks in the house. I actually had to bring it in one day while she was gone. The cabinet now sits in the closet of our office. I framed some shelves and made storage cabinets (doors on left of picture) for all of her scrap booking stuff and she couldn't be happier.
Page 2 - Hardware
Computer
I was lucky when it came to selecting a computer since I'm one of those IT guys and have had the opportunity to use a lot of stuff people have given me over the years. The computer was given to me by a guy who was upgrading to the latest and greatest Dell and he asked me if I knew where to send his old computer for recycling. My answer was yes I would take it for him for recycling. I scored a 2 gig P-4 Dell that had hardly seen the end of its lifespan. The only problem with it is that it only has 256 megs of ram. since it uses ram bus memory I have elected to not upgrade it as ram bus is way too expensive (couple hundred bucks) for my taste. I've heard the nay-sayers tell people 256 megs is not enough ram but I tell you people, it just works for my system. XP boots up fast and GameEx and Mame seem to have no trouble. Right now the most memory and graphics intensive program I am running would probably be Project 64, and it runs without so much as a hiccup.
Monitor
The Monitor I'm using is a 21" inch NEC I purchased off of Craig's list for $30. I was originally going to go with a 24" or 27" TV but with all the hassles I saw others going through with TV's I thought I would give a big monitor a shot. I'm not saying that in the future I won't go with a larger TV, but at the time $30 and a hassle free installation was just what I wanted. I do have an advantage that others don't however with the monitor choice. Back in the late 90s I purchased an Aver TV genie which turns your monitor into a TV. I had picked this thing up and almost threw it away about ten times, but hung on to it hoping I'd find a use for it some day. I don't use it for watching TV though, I used it for hooking up my Playstation 2 and it works great, plus it has a remote to turn it off and on and to change channels.
Speakers
The speakers are Logitech X-230s I bought for about $50. They sound pretty good but I wish they had a removable volume control. I built my own volume control and placed it on the back left of the control panel to be easily accessible but also out of sight. I used the directions from oscar controls for making the volume control. The speaker panels are Midway 6x9s I purchased at Mikes Arcade Amusements.

Power
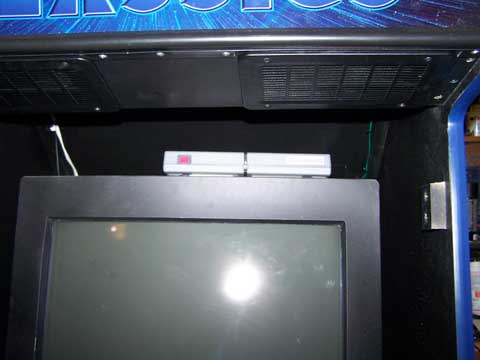
For lighting the trackball and coin door lights, I simply figured out the power rating for the lights and tapped into the power supply of the computer. I had a few open molex plugs on the power supply so I made a couple of wiring harnesses with the correct molex connectors minus the wires I didn't need and plugged them in. The trackball light is 12v and the lights I bought for the coin door were 5v so life was easy. For powering the marquee light and turning on the monitor, speakers, usb hub, etc, I used a Mini Power Minder from Bits Limited. The computer plugs into the Power Minder and when the computer is turned on, the other receptacle on the Power Minder gets turned on also which has a power strip plugged into it with all the other peripherals plugged into that. Its basically a relay switch. This is Bits LTD description of the power minder "The Mini Power Minder communicates with your PC via USB so when you start up or shutdown your computer, power to the secondary outlet starts or terminates at the same time. You'll control all your peripherals in one easy step! To control multiple devices, plug a power strip into the secondary socket." All I know is this was the easiest way I could find to turn everything on with one button push and took the worry away I would have had using a hacked surge protector/relay setup.

Smoked Glass
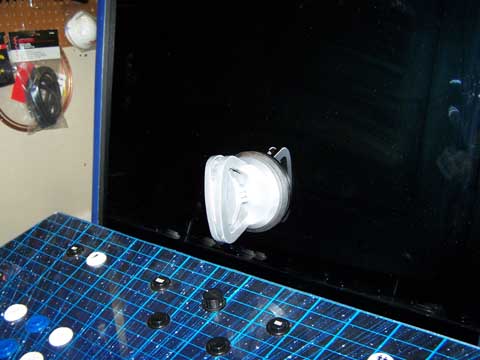
For the smoked glass I used, I chose to use actual glass and not plexi as I didn't want it to get scratched easily. The name of the glass is greylite # 14 and I bought it locally where I live. It was about $60. I think it is available all over the US as this guy (Mikes Arcade Cabinet - dead link) also used it in his cab. It looks really sharp but does have a glare problem sometimes so this will be another deciding factor for you to choose to use glass or not on your cab. I have the glass installed in such a way that it is easily removable from the cab with the use of a suction cup I bought at Harbor Freight.

Page 3 - Software
Front-ends
As I stated on the opening page, GameEx is the front-end I chose for my cabinet. I know that there are other front-ends out there that are very configurable and look very nice, but for me GameEx offers the most in the way of configurability and playability. I'm not even going to mention the other front-ends here because frankly after screwing around with them for months and not getting the answers I was looking for or only finding support forums in German, I decided that there had to be a better way. The guy that created GameEx, Tom Speirs, updates his front-end software almost weekly and includes many feature requests that may have been asked for only the day before. I implore you, if you are having a hard time understanding how to get your games up and running, give GameEx a try. But enough harping about GameEx. Lets take a look at....
Emulators
Probably the most talked about and played emulator for cabinets is Mame (Multiple Arcade Machine Emulator).
There are many flavors of Mame. There is the plain old command line version of Mame which is what my cab uses. There is AdvanceMame which plays all the roms that Mame does but has more options for video resolutions for real arcade monitors, TVs and such. Mame32 does just the same as Mame but has a gui (graphical user interface) so you get a front-end of sorts to choose games and change settings without using the old command line. All of these play well with GameEx. Mame emulates thousands of arcade games but it does not emulate all of them. For some games you will need another emulator such as ZINC, Kawaks or Model2. For Laser disc games such as Dragon's Lair there is the laserdisc emulator Daphne. The games for Daphne can be very large and will require you to have a big hard drive if you plan to have many of them. You do not have to be stuck just playing arcade games however. there are several console emulators out there for everything from the Atari 2600 up to the Sony Playstation and beyond. In fact it is much harder to find a system that isn't emulated than one that is, granted you won't find PS2, X-Box, X-Box 360 or Nintendo DS emulators out there that will work to any playable level (yet) but there are thousands and thousands of good older emulated games just waiting to be played.
OS
You can play Mame and other emulators on just about every system out there. For me Windows XP seemed to be the most supported operating system so I went with it, But there are other options available. I know that cabs have been made that run DOS, Windows 98, Mac OS, even Linux. If you are thinking you want to run GameEx however, you will want to run Windows 98SE, ME, 2000, XP or Windows MCE. You will also need the .net framework 2.0, Direct x 9.0 and Windows Media Player 9.
Page 4 - The Construction
Here is the beginnings of the control panel. I forgot to take pictures earlier in the process of making it. I spray painted it black early on to get an idea of what the color scheme would look like.

Here it is again opened up. One of my biggest mistakes in building the control panel is how it opens. It should open the other way, but it turned out to be just fine the way it is. In fact I rarely have to dive under the CP anymore since I've worked out all the bugs.

Here I test fitted the newly cut plexi to make sure everything fit OK.

Another shot of the test fit.

Here I am getting ready to pound the T-molding into it's slot on the control panel. Notice the graphics are also installed.
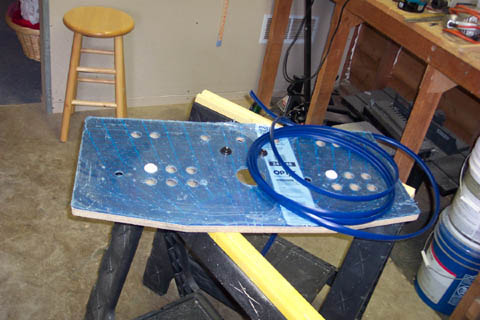
Here is a picture of the sides cut out. Notice the top left cut across the corner has not been completed yet. It was late that night and I thought I was done cutting.

Another shot of the almost complete sides.

Here is the base for the cab.

The bottom of the base.

Here is my son wondering what this contraption is that daddy is building.

Coin front and monitor shelf. I don't have a picture of it but the monitor shelf got some reinforcement boards underneath for the weight it would soon bear

Assembly of the keyboard drawer.

Finished and installed Keyboard/Playstation2 drawer.

Opened keyboard drawer.
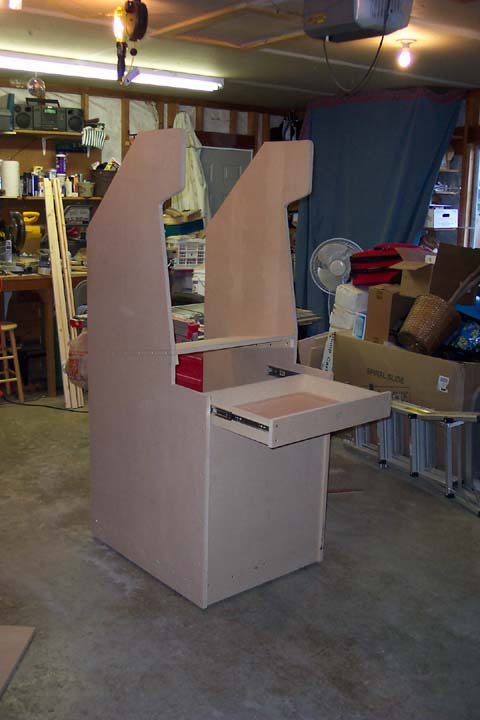
Getting closer

OK, the major wood work is done, now for some wood filler and sanding.

Here is a close up of the control panel

Newly installed coin door.
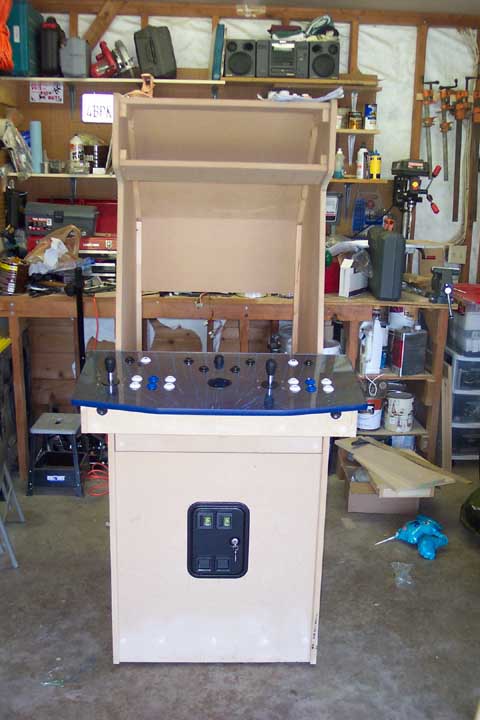
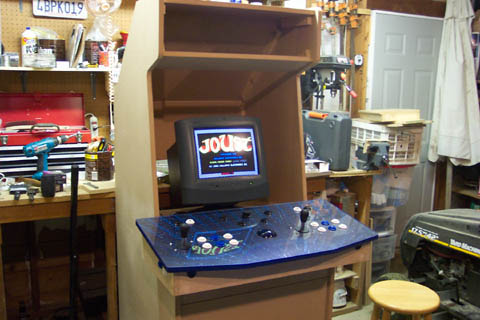
Picture of the CP's guts.
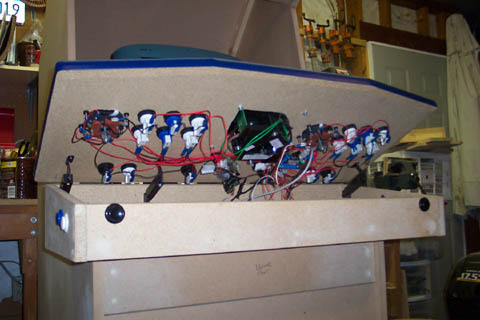
I finally got around to painting it and installing the rest of that T-molding.

Look at the reflection in the CP. Too bad plexi doesn't stay that shiny forever.

Another shot of the CP and keyboard drawer.

Here is the best shot I could get of the trackball lit up. This will be lit by super bright LED's in the future.

Here is a shot of the new (used) 21"monitor I got off of Craig's list for $30. I spray painted the bezel black. I also received and installed the marquee graphics.

Time to straighten up that wiring.

Here is a shot of the keyboard encoder. I was almost reluctant to buy a keywiz as it seemed most people buy I-pacs, but for my two player cab the keywiz has worked flawlessly and was easy to set up. Notice the black ground wire looks huge. I daisy chained all I could on the panel then realized the pinball buttons needed grounds also.

This is the inside of the CP looking at the volume control. I wanted the volume control to be easily accessible but hidden from view, so I put it on the back corner of the CP that sticks out over the edge of the cab.

Here is the back of the CP showing the volume knob and the speaker jack. The speaker jack is the nail/screw looking thing towards the center of the picture.
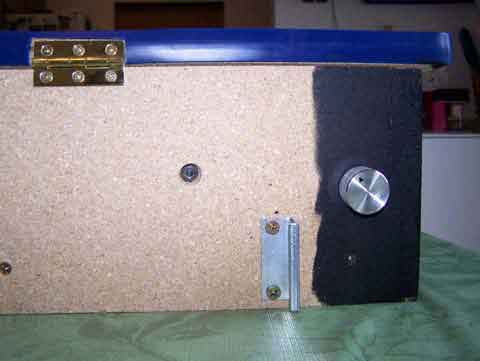
Here is a shot of the volume knob in action.

Here is all of the CP's cabling.
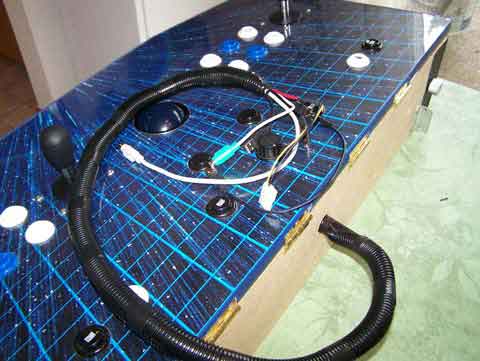
Another shot of the cabling. I wanted to be able to remove the CP easily if it was having a problem so I could more easily troubleshoot it. The top three wires from left to right are speaker, wireless keyboard receiver and spinner. The bottom three are molex plug for trackball light, trackball and keyboard encoder.

Here is a shot of the ever famous hard drive spinner hack.

Looking under the hood. Even after trying to tuck everything away it still can look like a rats nest. The box strapped down on the right is the subwoofer for the Logitech X230 speakers.

This is the Mini Power Minder from Bits Limited, it works great for turning everything off and on.

One Button to rule them all, one button to find them, one button to bring them all, and in the darkness bind them. Sorry just a little Tolkien nonsense!
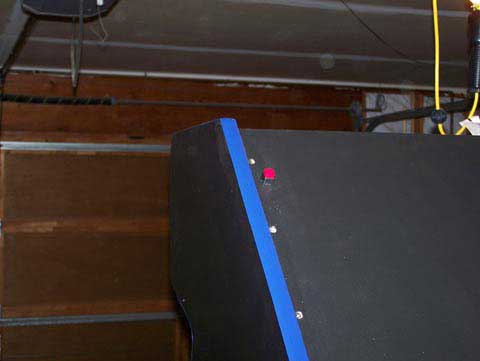
Here is the completed cab, If and when it ever comes in from the garage, I'll take some better pictures of it under better lighting conditions and with a clutter-free background.
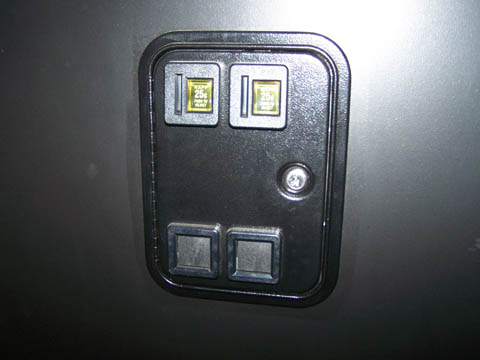
Here is a close up of the coin door I purchased from Happ. The product can be found here http://www.happcontrols.com/pc/accessories/40071300.htm
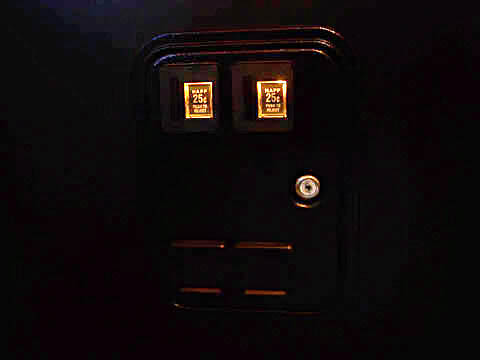
And here it is lit up.
Here is the coin door opened up. Notice the piece of wood holding the lights up. The lights were purchased from radio shack and are rated at 5 volts, they don't get very warm at all and I don't worry about them burning the wood.
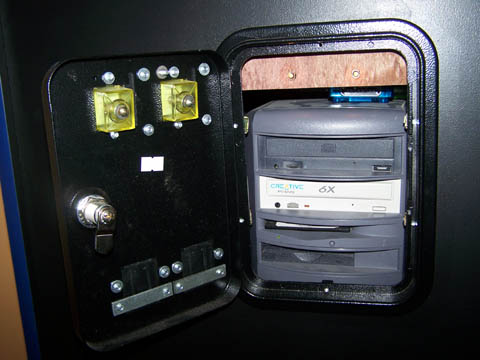
Here are the lights from the back. they are not much bigger than Christmas lights but they seem to do the job fine. In the future however I may replace these with superbright leds to get a little more out of them. Since I ran out of black wire I used red for both the ground and +5 volts. As long as you keep track of which is which, this shouldn't be a problem.

Powering the lights is quite simple if you have an extra molex plug coming off of your PC's power supply. I made a short harness to plug into the molex plug inside the PC so that it hung out of the PC by about 10 inches or so. Then I made a second harness which has the lights on it that is tacked down to the inside of the cab which plugs into the first harness. I made it this way so I could easily unplug the coin door lights without opening up the PC or tearing the lights out in case I ever need to take the PC out of the cab.

I strive to improve my living conditions by hoarding gold, food, and sometimes keys and potions. I love adventure, fighting, and particularly winning - especially when there's a prize at stake. I occasionally get lost inside buildings and can't find the exit. I need food badly.
What Video Game Character Are You?


Love it!! Where did you get the t-molding? Do you know the exact part # for it?
Thanks
Luis
I don’t remember the part # but I believe I got it from t-molding.com. If you go to their website you can order a free sample pack. Thats what I did.
Jay
I was wondering if you could help. I had a Mame game built for me back about 10 years ago. It was built in Utah by I think Jay Jay. I don’t think they are in business or this may be you but I have a question. When I turn on my game after it being off for a year it doesn’t boot or turn on the computer. The screen says NO SIGNAL.
I go to the computer and turn it on with its switch manually and it starts to boot. It stops and asks if I want setup hit delete or continue hit F1. I hit F1 and it continues to boot up and works fine. Is there a battery unit or something that tells it to boot the computer that went dead? Email me Thanks Ron
Email sent.