 After much procrastination I finally got around to getting a shed started this year. Part of the procrastination was due to me being gone every other weekend on a hiking trip and part was due to not knowing exactly where I wanted to put the shed. Another project I had going on this year was painting my house. Once the house painting was finished and most of my hiking objectives for the year were complete, I had no more excuses for not getting this thing started. I have to give credit to my father-in-law Jim for helping with this. Not only for the use of his tools and truck for supplies but also for his knowledge of construction. Without Jim's help, I would still be putting the walls up.
Location, location, location.
We live on a half an acre. Our house sits right on the NE corner of the property. We would love to one day be able to add on to the house, but the way our house sits, it will be difficult to add on unless we add to the front of the house. This problem has kept me up at night thinking of where to build the shed. I'm pretty sure there are some regulations against building anything on a septic drain field, not that I'd want to anyways. With the size of the rest of the back yard, the front of the property was my only viable option. I kind of wanted to build it next to the garage, but that would put it right next to an easement on the property which is a dirt driveway the neighbors use. The place I ended up putting it seemed to be the only logical place for it. My only problem is there are some big trees next to that end of the property that lose some big branches every year, plus it is in perpetual shade from the trees. With that being my only problem with the area and a lack of anywhere else that seemed logical, I decided to put the shed in that location.
Shed Plans.
Now that I knew where I wanted the shed, it was time to look at shed plans. I went to my local library and picked up everything they had available on sheds and small outdoor structures. Ultimately I found the book below to be the most useful but it was not the only one I referred to.
Building Details and expenses.
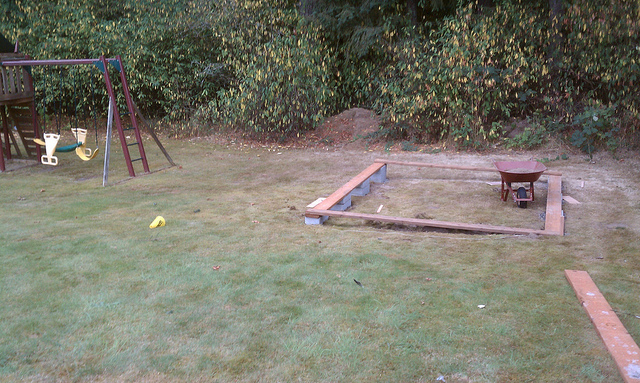
- Footprint and flooring: I decided to build a 10' X 12' shed. I originally wanted to pour a slab and build on that but factors including expense, labor, and my skill level led me to choose building a wooden floor on concrete blocks instead. I went with basic 4"x8"x16" concrete blocks since they seemed to be about the cheapest thing to get, however in retrospect, they were probably not the easiest to work with. I used pea gravel to set the blocks on and level them. I then made a frame out of pressure treated 2x6 lumber and laid a plywood floor from 3/4" plywood sheathing. Afterthoughts: The floor was probably the easiest and least expensive part of the whole building. If I was to do it again, I would skip the blocks I used and use pier blocks with height adjustable galvanized brackets. This would have saved a lot of time and would be easier to adjust later down the road should the shed become un-level. You live and you learn.
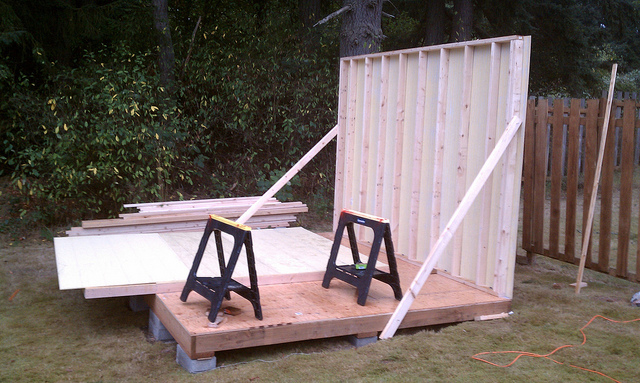
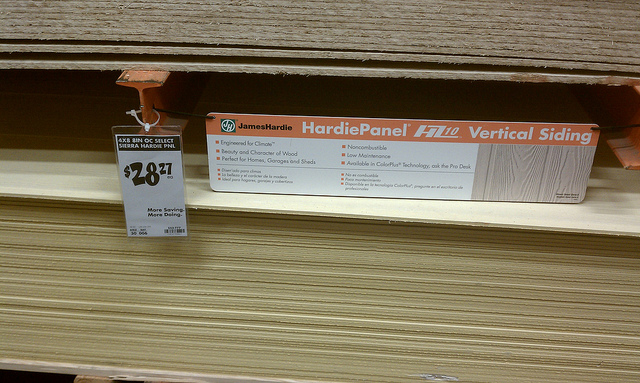
- Walls: I wanted something similar to the ToughShed designs you see at Home Depot but I wanted the shed to be bigger and stronger. I decided to go with 8' walls with Hardie Panel siding. I also opted for a couple of windows for natural daylight and aesthetic reasons. The walls were framed 16" OC (on center) but we later added studs at 24" OC to give more support for the roof which would be framed 24" OC. This was probably overkill but I can't see how it will hurt. Afterthoughts: Choose your siding wisely. I went with Hardie Panel because of the damp shady conditions where the shed was built. Great idea but it is pretty expensive at $28+ per sheet. Also due to what it is made out of, it is very hard on the tools and requires special blades to cut it. It is also very heavy.
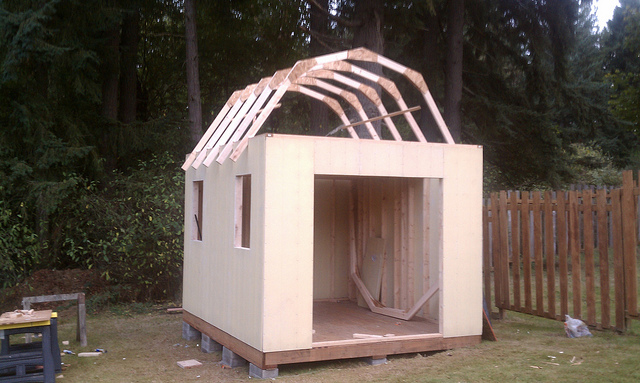
- Roof: The one thing that I could find no information on in any book was how to design a gambrel style roof. There were plenty of plans and dimensions for gambrel style roofs for particular size sheds, 8' wide, 12' wide, 16' wide etc, but I could find next to nothing with dimensions for a 10' wide shed. Even searching the internet seemed to be pretty much devoid of anything useful. The one exception is the video below titled - How to layout and Build trusses for your gambrel barn or shed. Following this guy's directions, we easily laid out our trusses and found the dimensions we needed for cutting the lumber. Once your trusses are done, the roofing is pretty easy. 7/16 OSB sheathing followed by tar paper then shingles. I looked at the pattern of the shingles on the roof of my house to figure out how to place them on the shed. Basically they are staggered to not repeat until the fifth row. Afterthoughts: Going with a gambrel style roof is great for gaining extra usable space, but in building this style roof, a lot more construction materials are needed. More Hardie Panel for the walls, more roof sheathing, more shingles and tar paper than a standard roof. Definitely more expensive to build but in the long run, the extra space will be worth it.
- Loft: The one thing I really wanted in a shed was a loft. In fact, the reason I wanted to go through the hassle of building a gambrel roof in the first place was to be able to have the extra space it would provide for a loft. With the walls being 8' high, I went with a loft utilizing 2x6's that acted as joists with the bottom of the 2x6's measuring 7' from the floor. We measured and cut them to fit across the shed and used lag bolts to tie them in with the walls. The joists were placed at 16" OC. The second joist closest to the door of the shed was skipped to allow entrance to the loft above. The flooring of the loft is 7/16" OSB sheathing.
- Doors: The doors are 3' wide (ea) by 7' tall. Simple 2x4 frames with Hardie Panel. The size of the doors required one sheet of Hardie Panel per door.
- Finishing Touches: The trim used on the shed is 3/4"x4" pre primed cedar boards. They are sold in the 12' lengths at Home Depot for around $18 per board. They sell shorter lengths of the same thing un-primed for a LOT less. The pre priming is a short cut and I'm not sure it was worth it but it got the job done a lot quicker.
- Total Cost: Hard to say how much I spent since I didn't keep an official tally but I'm guessing it was close to a couple grand.
Other things to consider.
The single most expensive part of building the shed was without a doubt the Hardie Panel at $28+ per 4'x8' sheet. While a good choice for the location of the shed, cheaper alternatives are available and I might have gone with something else if I had built the shed in a different location.
One thing that was totally off my radar in terms of expenses was the primed cedar trim we went with. If I was to do it all again, I wouldn't have been in such a rush and would have went with the cheaper stuff and primed it myself.
Roofing materials weren't cheap but that was expected.
We used screws to attach the siding to the wall framing. Screws are more expensive than nails but I went with my father-in-law's logic that you can simply unscrew it if you mess up. Not so easy to dis-assemble if you nail it down. We also used screws for the flooring.
The windows, to my surprise were cheaper than I thought they would be. I went with 24"x48" single hung Jeld Wen windows and they were $115 each.
Other miscellaneous hardware and tools can add up really quick. A circular saw blade to cut Hardie Panel is $55 (which didn't even work very well). Diamond grit jigsaw blades were $11 each (which worked great on the Hardie Panel). Lots of lag screws were used to tie walls to floors and joists to walls. These ranged from around .75 cents each to $1.75 each. Probably spent $40 on lag screws alone. Door hardware - hinges, handles, hasps, etc. Another $40 or so.
To be continued...
I still have some work to do to the shed. Most notably, I need to paint it, put on some trim along the roof line, add the vents and build a ramp. On the inside, I am toying with the idea of insulating it before I finish the walls with plywood. If I ever want to throw a little heater or pot belly stove in there, it should be insulated first.
Photos:


March 25th 2012 update
Finally had a nice weekend so I got around to painting the shed. It will need another coat but I thought I would put a picture up to show how much better it looks.

Hi Jay, thanks for the great post. I’m thinking of using Hardipanel as well, may I ask you a few questions?
1. I noticed on the install manual that the Hardiepanel requires a moisture barrier. But I assume that it was for a home w. a large humidity/temperature difference inside vs outside. did you use a moisture barrier and what is your opinion of that?
2. did you just put the hardiepanel screwed right into the studs?
3. did you buy the primed hardiepanel or the painted type. i’m not a big fan of painting and i heard it comes prefinished.
Thanks!! That’s a really nice shed.
Andrew
Hi Andrew. Since it is just a shed, I skipped the moisture barrier. Not real sure how useful it would be. If I was to insulate the shed, or like you said expect a large temperature difference inside vs outside, it may have been a good idea.
Yep, Hardie panel screwed right in to the studs.
The Hardie Panel I used was pre-primed. I’ve recently painted the shed. I’m not fond of priming stuff myself so the pre-primed treatment was really nice.
Thanks for the compliments, happy shed building!
Jay
Hi – nice work! Question #1 was asked by Andrew (barrier ?). #2 is whether you managed to score and snap your boards at all or did you make all cuts with a saw? Former is recommended but not practical for other than entirely vert. lines(?)…
Hi Jim.
#1 No barrier. Probably could have but this is just a shed so I’m not real worried about it. i don’t live in it.
#2 Hardie Panel is pretty tuff stuff. Not sure if you can score and snap but I guess its possible. We didn’t try. We used a jig saw with a carbide blade. We went through 3 or 4 blades for the entire project. You could maybe get a couple cuts without a carbide before the blade was too dull to cut with. We tried a Hardie Panel Blade on a skilsaw but it just didn’t seem to do the job for us. The jigsaw was time consuming but we didn’t waste any hardie board. I would definitely do the jigsaw way again.
Jay
Nice! But would add half by half-inch wire netting around the base before you have skunks, etc., enjoying your shed too 🙂 Dig in into the soil 2-3 inches to discourage the burrowers . . . .
Good idea Bill. I did have plans to put some lattice around the bottom but I havent gotten around to it yet.
The panels don’t over lap, so what did you use to seal the crack between each panel before painting it?
Off the top of my head, I don’t really remember but it was caulking suitable for Hardie Panel. We just asked someone at the hardware store.