Carbon Fiber Tripod on the Cheap and a Poor Man's Do It Yourself L Bracket

Since getting into photography a couple years ago, I've had my eye out for a cheap, sturdy, lightweight tripod. While it's quite easy to find cheap tripods, nothing I could find looked sturdy enough to hold a DSLR and not shake while doing long exposures. Most of the tripods I could find that were sturdy were either very heavy or way out of my price range. Seriously, who pays $800 - $900 for a tripod? I guess if photography is how you make a living you may have your reasons for going this route but for a photo hack such as myself, anything more than a couple hundred dollars is a lot for an accessory.
Generally, the majority of the time, I hand hold my camera while shooting, but in some situations you just can't get around not using a tripod. Being a backpacker, going light is very important to me. My camera and accessories minus the tripod already weigh in at about 5 lbs. I purchased a Slik Compact II last year for $30 that I take backpacking and is not too heavy at 2.75 lbs. While the Slik works good for backpacking, it is not really the ideal tripod for everyday shooting. I have been on a mission to find something that would do the job I wanted it to and not break the bank.
I read a thread in a photo forum somewhere that talked about good tripods for cheap and it mentioned the Flashpoint F-1127 Carbon Fiber Tripod from Adorama for $139.95. For a carbon fiber tripod that was under $200 I was skeptical but people were giving it a decent review in the post I was reading so I went ahead and bit the bullet and purchased it.
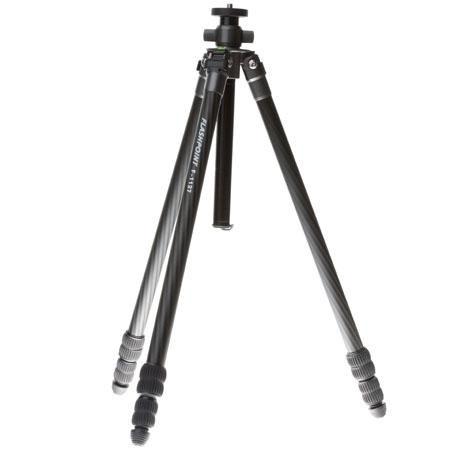
Flashpoint F-1137
$139.95 at Adorama
So I had the tripod, all I needed now was a head for it. There are several types of tripod heads you can buy. I was in the market for a simple ball head. Due to the fact that I'm cheap, I used the ball head from my Slik temporarily until I decided exactly what I wanted. After working with the simple ball head from my Slik, I knew I wanted something with a rapid connect plate that was easier to use than screwing the camera on and off the tripod all the time. I also wanted to be able to easily replace the plate if I lost one. Research led me to the Manfrotto compact ball head 496 with the RC2 rapid connect plate. The RC2 looked to be pretty standard and easy enough to purchase a replacement plate in the event of a loss or just to have an extra. I already knew I would need an extra as I had plans to make an L bracket which I'll describe below.
I was lucky in the timing of my tripod purchase, as Christmas was just around the corner and Santa brought me the ball head that I wanted.
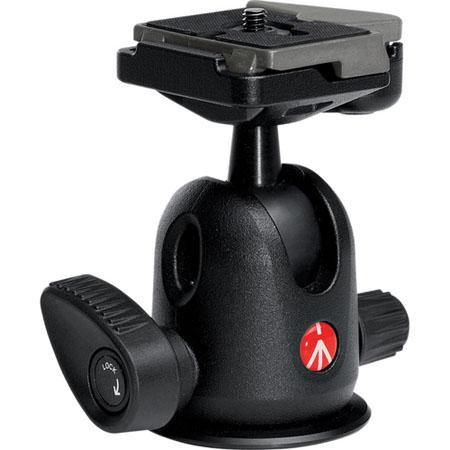
Manfrotto Compact Ball Head 496 with RC2 Rapid Connect Plate
$73.79 + a $10 instant rebate at Adorama
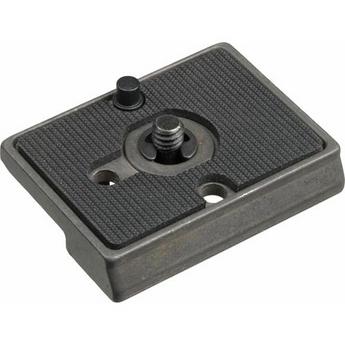
Manfrotto Rapid Connect Mounting Plate 1/4-20" for RC-2 Quick Release Systems
$13.95
After using this combo a couple times, I can say I am very happy with the results. A nice sturdy, well built for the price and lightweight tripod for a couple hundred bucks.
Poor Man's L Bracket
So what is this L bracket thing I keep mentioning? An L bracket or right angle quick release is an accessory attachment you can use on your camera and tripod that will let you quickly switch between landscape and portrait on your camera while keeping the camera centered over the top of the tripod regardless which mode you are shooting. Without the L bracket, when rotating the camera on the tripod to portrait mode, the camera becomes off-center on the tripod which could make the tripod unstable. You also lose a lot of range of movement on the ball head when you adjust it to accommodate this type of shot. Using an L-bracket fixes this.

Before I begin, let me state that I didn't come up with this excellent solution for a do it yourself or DIY L bracket. I read about this on the DIY Photography website. I followed the instructions pretty close except for some of the tools I used.
First you will need to buy the materials.
 Extra Mounting Plate: I needed an extra Manfrotto RC-2 mounting plate to go with my ball head.
 L bracket Material: 1/4 x 3 x 4 inch Angle 6061-T6 Aluminum cut to 1.5 inches thick. I bought from the same place mentioned in the DIY article, Speedy Metals. I purchased 3 pieces so I could make some extras in case any of my photography friends were interested in having one. It was just a little over $5 for the material and close to $20 after shipping costs.
 Tap and Tap Wrench: I bought mine from Lowes. The tap itself worked out OK but the wrench was a piece of crap. The tap is a 1/4"-20.
You will also need a 1/4"-20 x 5/8" screw. You can buy a pack of 5 of these for a couple bucks at Lowes.
The basic idea is to fit the L bracket to your camera so that you can still get your battery out and for the bracket to not block the side port so you can still can plug in a shutter release remote cable. I won't go into the exact instructions on how to build this since you can follow the instructions on the DIY site. I will show the pictures from my build however. Mine is almost identical to the one on the DIY site except that I used a hack saw to trim a bit off the long end of the bracket to accommodate the battery door.


So you don't want to look cheap like me and you want to buy a "real" L-bracket? Arca Swiss, Really Right Stuff and Kirk Enterprises all make some really nice, professional L-brackets. Keep in mind, the prices below are assuming that you already own a mounting plate and Ball head that will work with whatever brand L plate you are getting.
Arca Swiss L-Plate $248 at B&H
Really Right Stuff $125 for my camera. For a Canon Mark 5d II $140-$183 depending on your needs.
Kirk Enterprises $124 for my camera. For a Canon 5D Mark II $139.95-$179.95 depending on your needs.
A generic option is the Manfrotto 341 Junior Elbow Bracket. It works with the RC-2 quick disconnect plate and is only $75 on Amazon. Problem is that since it is a one size fits all solution it is kind of ugly.
My home-made, DIY L bracket with quick connect plate to connect to my existing system cost me about $45 after shipping costs and for purchasing the tools I needed. I'm cheap, what can I say?
Fascinating to see how you made this all work and for a fraction of what I had to invest in basically the same set up . .
If I had the money, I would just buy the real thing. I have to admit though, there is a certain satisfaction from building your own.
Niice.. I’ve read other posts where people did bevel the edges to fit the arca swiss plate but you just used the pre built ones. Smarty boy but did you take in the cost of those arca swiss plates in those $45 ? ;-))).. Regardless, this is way much more less painful as compared to what many others have posted. If you still have the material, can you please cut a 1.5″ thick slice of that aluminium plate and I’ll try to drill the hole for my Canon 5D Mk II ? Please email me for any comments/questions.
Thanks for the comment. I’m not sure why you couldn’t just order the material from the metals place yourself but if you are local to where I live, and you are having trouble getting the material I might be able to help you out. Otherwise, it would probably be just as easy for you to order the stuff yourself. I included the link in the article.
The reason I looked at this website was ‘coz the title said “Poor Man’s DIY” and I was just trying to save some money. Would’ve paid for the slice and shipping. But don’t bother.. I just bought a braket and will soon try to configure a full fledged multi-right-angle L bracket for full panoramic swing without any issues of battery pack or inaccessible remote point etc..
In small cities of Pakistan I can’t find these brackets on camera shops so I need to build those my self. I just modified it a bit and made adjustable for nodel point. any way thanks article was real helpful.